Diferencia entre revisiones de «Master-enchant»

De Oroza RO Wiki
Ir a la navegación Ir a la búsqueda
Sin resumen de edición
 
(No se muestra una edición intermedia del mismo usuario)
Línea 4: Línea 4:
<div class="oroza-flex-wrapper" style="display: flex; gap: 30px; align-items: flex-start; flex-wrap: wrap;">


<!-- Side menu -->
<div style="width: 260px; flex-shrink: 0;">
{{MenuLateral}}
{{MenuLateral}}
</div>
</div>


<!-- Main content -->
<div style="flex: 1; min-width: 0; padding: 10px;">
<html>
<html>
Línea 15: Línea 13:
   <div class="oroza-page">
   <div class="oroza-page">


    <div style="margin: 20px auto; text-align: center;">
      <img src="/wiki/resources/assets/random_options/Master_Enchant.png" alt="Master Enchant in Prontera" class="round-fade">
    </div>


    <div class="oroza-hero-card">
<div style="margin: 20px auto; text-align: center;">
      <h2 class="oroza-page-title">🌟 Enchantment Master</h2>
  <img src="/wiki/resources/assets/random_options/Master_Enchant.png" alt="Master Enchant in Prontera" class="round-fade">
      <p class="oroza-page-intro">
</div>
        The <strong>Random Options</strong> system lets you add random bonuses to your equipment,
 
        unlock new enchantment slots, and re-roll bonuses that do not fit your build.
<div class="oroza-hero-card">
        The exact result remains random, but you can choose the direction you want for your equipment:
  <h2 class="oroza-page-title">🌟 Enchantment Master</h2>
        physical, magical, defensive, or utility-focused.
  <p class="oroza-page-intro">
      </p>
    The <strong>Random Options</strong> system allows you to add random bonuses to your equipment,
    </div>
    unlock new enchantment slots, and re-roll an existing bonus.
    You do not choose the exact bonus: the result is generated randomly according to the
    <strong>equipment category</strong> and the <strong>slot</strong> you are modifying.
  </p>
</div>


<div class="box-info">
  <strong>📍 Location:</strong> Find the <strong>Master Enchant</strong> NPC in
  <strong>Prontera (164, 170)</strong>.<br>
  You must equip the item you want to enchant before speaking with him.
</div>


    <div class="box-info">
<div class="box-tip">
      <strong>📍 Location:</strong> Find <strong>Master Enchant</strong> at
  <strong>📚 Check the bonus tables:</strong><br>
      <strong>Prontera (164, 170)</strong>.<br>
  To review every available bonus and filter them by <strong>equipment category</strong>
      You must equip the item you want to enchant before speaking to the NPC.
  and <strong>bonus slot</strong>, visit:
    </div>
  <a href="https://en.orozaro.com/wiki/index.php?title=Bonus-equipo" target="_blank" rel="noopener">
    <strong>Equipment Bonuses</strong>
  </a>.
</div>


    <div class="oroza-grid oroza-grid-2">
<div class="oroza-grid oroza-grid-2">
      <div class="oroza-action-card">
  <div class="oroza-action-card">
        <h3 class="oroza-action-title">What does this system do?</h3>
    <h3 class="oroza-action-title">What can it do?</h3>
        <p class="oroza-section-text">
    <p class="oroza-section-text">
          It adds <strong>Random Options</strong> to compatible equipment. Each option occupies an individual slot
      You can unlock empty slots and re-roll existing bonuses on weapons, shields,
          and may grant bonuses such as ATK, MATK, HP, resistances, stats, damage against specific targets,
      armors, garments, shoes, accessories, and headgears.
          cast reduction, and more.
    </p>
        </p>
  </div>
      </div>


      <div class="oroza-action-card">
  <div class="oroza-action-card">
        <h3 class="oroza-action-title">What can you do?</h3>
    <h3 class="oroza-action-title">What can it not do?</h3>
        <p class="oroza-section-text">
    <p class="oroza-section-text">
          You can <strong>unlock empty slots</strong> or <strong>re-roll existing slots</strong>.
      You cannot choose a specific bonus or manually remove a slot.
          Re-rolling only changes the selected bonus slot; your other slots remain unchanged.
      Every roll uses the tables assigned to the selected equipment type.
        </p>
    </p>
      </div>
  </div>
    </div>
</div>


    <details class="oroza-accordion" open>
<details class="oroza-accordion" open>
      <summary>🧭 How to use the Enchantment Master</summary>
  <summary>🧭 How to use the Enchantment Master</summary>
      <div class="oroza-accordion-content">
  <div class="oroza-accordion-content">
        <ol class="oroza-feature-list">
    <ol class="oroza-feature-list">
          <li>Equip the weapon, armor, shield, accessory, or gear piece you want to improve.</li>
      <li>Equip the item you want to enchant.</li>
          <li>Speak to <strong>Master Enchant</strong> at Prontera (164, 170).</li>
      <li>Speak with <strong>Master Enchant</strong> in Prontera (164, 170).</li>
          <li>Select <strong>Enchant Equipment</strong>.</li>
      <li>Select <strong>Enchant Equipment</strong>.</li>
          <li>Choose the equipment position containing your item.</li>
      <li>Choose the equipment position where your item is equipped.</li>
          <li>Review the current slots and choose the one you want to unlock or re-roll.</li>
      <li>Review the current slots and choose one to unlock or re-roll.</li>
          <li>Select your payment method: Zeny or Cash Points.</li>
      <li>If it is a weapon and you modify Slot 2, 3, or 4, you may choose an optional focus.</li>
          <li>If you are an active VIP player, you may also use <strong>VIP Safe Enchantment</strong>.</li>
      <li>Select your payment method: Zeny or Cash Points.</li>
          <li>Select the available path for that equipment type.</li>
      <li>VIP players may also select <strong>Safe VIP Enchantment</strong>.</li>
          <li>The system will roll the attempt and show success, failure, or destruction.</li>
      <li>The system will perform the roll and show whether it succeeded, failed, or destroyed the item.</li>
        </ol>
    </ol>


        <div class="box-tip">
    <div class="box-warning">
          <strong>Tip:</strong> Decide which path you want before paying. The system charges the cost
      <strong>Important:</strong> The cost is charged for every attempt, including failed attempts
          before displaying the focus selection, so it is best to know what your build needs beforehand.
      and attempts that result in equipment destruction.
        </div>
    </div>
      </div>
  </div>
    </details>
</details>


    <details class="oroza-accordion">
<details class="oroza-accordion">
      <summary>🧩 Compatible equipment</summary>
  <summary>🧩 Compatible equipment</summary>
      <div class="oroza-accordion-content">
  <div class="oroza-accordion-content">
        <p class="oroza-section-text">
    <p class="oroza-section-text">
          The NPC recognizes the following equipment positions. The item must be equipped before it can be selected.
      The item must be equipped. The NPC recognizes the following categories:
        </p>
    </p>


        <div class="oroza-table-wrap">
    <div class="oroza-table-wrap">
          <table class="oroza-info-table">
      <table class="oroza-info-table">
            <thead>
        <thead>
              <tr>
          <tr>
                <th>Equipment type</th>
            <th>Category</th>
                <th>How the system recognizes it</th>
            <th>Position recognized by the NPC</th>
              </tr>
          </tr>
            </thead>
        </thead>
            <tbody>
        <tbody>
              <tr>
          <tr>
                <th>Weapons</th>
            <th>Weapons</th>
                <td>Right-hand weapons and weapons equipped in the left hand.</td>
            <td>Weapon equipped in the right hand or weapon equipped in the left hand.</td>
              </tr>
          </tr>
              <tr>
          <tr>
                <th>Shields</th>
            <th>Shields</th>
                <td>Defensive equipment placed in the left-hand slot.</td>
            <td>Defensive equipment placed in the left-hand position.</td>
              </tr>
          </tr>
              <tr>
          <tr>
                <th>Armor</th>
            <th>Armors</th>
                <td>Equipment worn in the body slot.</td>
            <td>Equipment placed in the body position.</td>
              </tr>
          </tr>
              <tr>
          <tr>
                <th>Headgears</th>
            <th>Garments</th>
                <td>Upper, middle, and lower headgear.</td>
            <td>Equipment placed in the Garment position.</td>
              </tr>
          </tr>
              <tr>
          <tr>
                <th>Garments</th>
            <th>Shoes</th>
                <td>Equipment worn in the garment slot.</td>
            <td>Equipment placed in the Shoes position.</td>
              </tr>
          </tr>
              <tr>
          <tr>
                <th>Shoes</th>
            <th>Accessories</th>
                <td>Equipment worn in the shoe slot.</td>
            <td>Accessory 1 and Accessory 2.</td>
              </tr>
          </tr>
              <tr>
          <tr>
                <th>Accessories</th>
            <th>Headgears</th>
                <td>Accessory 1 and Accessory 2.</td>
            <td>Top, Mid, and Low Headgear positions.</td>
              </tr>
          </tr>
            </tbody>
        </tbody>
          </table>
      </table>
        </div>
    </div>


        <div class="box-warning">
    <div class="box-info">
          <strong>Important:</strong> The system only works with the item equipped when the process starts.
      <strong>Note:</strong> You cannot directly select an item stored in your inventory,
          You cannot select an item directly from your inventory, cart, or storage.
      cart, or storage. You must equip it first.
        </div>
    </div>
      </div>
  </div>
    </details>
</details>


    <details class="oroza-accordion">
<details class="oroza-accordion">
      <summary>🔓 Random Option slots</summary>
  <summary>🔓 Random Option slots and costs</summary>
      <div class="oroza-accordion-content">
  <div class="oroza-accordion-content">
        <p class="oroza-section-text">
    <p class="oroza-section-text">
          Compatible equipment can have up to <strong>3 Random Option slots</strong>.
      All compatible equipment can have up to <strong>3 slots</strong>.
          Characters with <strong>10 or more Legendary Rebirths</strong> can use a
      Characters with <strong>10 or more Legendary Rebirths</strong> can use
          <strong>fourth slot</strong>.
      a <strong>fourth slot</strong>.
        </p>
    </p>


        <div class="box-info">
    <div class="oroza-table-wrap">
           <strong>The fourth-slot requirement is checked per character.</strong><br>
      <table class="oroza-info-table">
           The character speaking to the NPC must have 10 or more Legendary Rebirths.
        <thead>
         </div>
           <tr>
            <th>Slot</th>
            <th>Requirement</th>
            <th>Unlock Cost</th>
            <th>Re-roll Cost</th>
          </tr>
        </thead>
        <tbody>
          <tr>
            <th>Slot 1</th>
            <td>Available from the beginning.</td>
            <td>1,000,000 Zeny / 100 CP</td>
            <td>1,000,000 Zeny / 100 CP</td>
          </tr>
           <tr>
            <th>Slot 2</th>
            <td>Slot 1 must have an active bonus.</td>
            <td>3,000,000 Zeny / 300 CP</td>
            <td>1,000,000 Zeny / 100 CP</td>
          </tr>
          <tr>
            <th>Slot 3</th>
            <td>Slot 2 must have an active bonus.</td>
            <td>7,000,000 Zeny / 700 CP</td>
            <td>1,500,000 Zeny / 150 CP</td>
          </tr>
          <tr>
            <th>Slot 4</th>
            <td>10+ Legendary Rebirths and Slot 3 active.</td>
            <td>10,000,000 Zeny / 1,000 CP</td>
            <td>1,500,000 Zeny / 150 CP</td>
          </tr>
         </tbody>
      </table>
    </div>


        <div class="oroza-table-wrap">
    <div class="box-tip">
          <table class="oroza-info-table">
      <strong>Progression rule:</strong> slots must be unlocked in order.
            <thead>
      You cannot unlock a slot while the previous slot is still empty.
              <tr>
    </div>
                <th>Slot</th>
  </div>
                <th>Unlock condition</th>
</details>
                <th>Unlock cost</th>
                <th>Re-roll cost</th>
              </tr>
            </thead>
            <tbody>
              <tr>
                <th>Slot 1</th>
                <td>Available from the beginning.</td>
                <td>1,000,000 Zeny / 100 CP</td>
                <td>1,000,000 Zeny / 100 CP</td>
              </tr>
              <tr>
                <th>Slot 2</th>
                <td>Slot 1 must contain an active option.</td>
                <td>5,000,000 Zeny / 500 CP</td>
                <td>1,000,000 Zeny / 100 CP</td>
              </tr>
              <tr>
                <th>Slot 3</th>
                <td>Slot 2 must contain an active option.</td>
                <td>10,000,000 Zeny / 1,000 CP</td>
                <td>2,000,000 Zeny / 200 CP</td>
              </tr>
              <tr>
                <th>Slot 4</th>
                <td>10+ Legendary Rebirths and Slot 3 active.</td>
                <td>15,000,000 Zeny / 1,500 CP</td>
                <td>2,000,000 Zeny / 200 CP</td>
              </tr>
            </tbody>
          </table>
        </div>


        <div class="box-tip">
<details class="oroza-accordion">
          <strong>Progression rule:</strong> slots must be unlocked in order.
  <summary>💰 Payment methods</summary>
          You cannot unlock Slot 2 while Slot 1 is empty, and you cannot advance to Slots 3 or 4 without filling the previous slot.
  <div class="oroza-accordion-content">
        </div>
    <p class="oroza-section-text">
      </div>
      Every attempt can be paid with <strong>Zeny</strong> or <strong>Cash Points</strong>.
     </details>
     </p>


     <details class="oroza-accordion">
     <div class="box-info">
       <summary>💰 Payment methods</summary>
       <strong>Conversion:</strong> 1 Cash Point = 10,000 Zeny.
      <div class="oroza-accordion-content">
    </div>
        <p class="oroza-section-text">
          Each attempt can be paid with <strong>Zeny</strong> or <strong>Cash Points</strong>.
          The system uses the following conversion:
        </p>


        <div class="box-info">
    <p class="oroza-section-text">
          <strong>1 Cash Point = 10,000 Zeny</strong>
      The costs shown in the table are base costs. Weapon Focus and Safe VIP Enchantment
        </div>
      modifiers are applied before payment.
    </p>
  </div>
</details>


        <p class="oroza-section-text">
<details class="oroza-accordion">
          Used Cash Points are deducted from the points available on your account.
  <summary>🎲 Success rates and possible outcomes</summary>
          The cost is charged on every attempt, including attempts that fail.
  <div class="oroza-accordion-content">
        </p>
    <p class="oroza-section-text">
      </div>
      In Normal Mode, each attempt can result in success, failure, or destruction.
     </details>
      The destruction chance is <strong>5%</strong> for every slot.
     </p>


     <details class="oroza-accordion">
     <div class="oroza-table-wrap">
       <summary>🎲 Rates and outcomes</summary>
       <table class="oroza-info-table">
      <div class="oroza-accordion-content">
         <thead>
         <p class="oroza-section-text">
          <tr>
           Every normal attempt has three possible outcomes:
            <th>Slot</th>
           <strong>success</strong>, <strong>failure</strong>, or <strong>destruction</strong>.
            <th>Normal Success</th>
           The rates depend on the selected slot.
            <th>Normal Failure</th>
         </p>
            <th>Normal Destruction</th>
            <th>Safe VIP Success</th>
            <th>Safe VIP Failure</th>
          </tr>
        </thead>
        <tbody>
          <tr>
            <th>Slot 1</th>
            <td>95%</td>
            <td>0%</td>
            <td>5%</td>
            <td>100%</td>
            <td>0%</td>
          </tr>
          <tr>
            <th>Slot 2</th>
            <td>90%</td>
            <td>5%</td>
            <td>5%</td>
            <td>95%</td>
            <td>5%</td>
          </tr>
          <tr>
            <th>Slot 3</th>
            <td>85%</td>
            <td>10%</td>
            <td>5%</td>
            <td>90%</td>
            <td>10%</td>
           </tr>
           <tr>
            <th>Slot 4</th>
            <td>80%</td>
            <td>15%</td>
            <td>5%</td>
            <td>85%</td>
            <td>15%</td>
           </tr>
         </tbody>
      </table>
    </div>


        <div class="oroza-table-wrap">
    <div class="box-warning">
          <table class="oroza-info-table">
      <strong>Destruction:</strong> if it happens in Normal Mode, the equipment is completely lost,
            <thead>
      including its refine level, cards, fragments, and Random Options.
              <tr>
    </div>
                <th>Slot</th>
                <th>Normal success</th>
                <th>Normal failure</th>
                <th>Normal destruction</th>
                <th>VIP Safe success</th>
                <th>VIP Safe failure</th>
              </tr>
            </thead>
            <tbody>
              <tr>
                <th>Slot 1</th>
                <td>95%</td>
                <td>0%</td>
                <td>5%</td>
                <td>100%</td>
                <td>0%</td>
              </tr>
              <tr>
                <th>Slot 2</th>
                <td>85%</td>
                <td>10%</td>
                <td>5%</td>
                <td>90%</td>
                <td>10%</td>
              </tr>
              <tr>
                <th>Slot 3</th>
                <td>75%</td>
                <td>20%</td>
                <td>5%</td>
                <td>80%</td>
                <td>20%</td>
              </tr>
              <tr>
                <th>Slot 4</th>
                <td>70%</td>
                <td>25%</td>
                <td>5%</td>
                <td>75%</td>
                <td>25%</td>
              </tr>
            </tbody>
          </table>
        </div>


        <div class="box-warning">
    <div class="box-tip">
          <strong>Destruction:</strong> normal mode has a 5% chance to completely destroy the equipment.
      <strong>Failure without destruction:</strong> your equipment remains intact. If you were unlocking
          If this happens, the item is lost together with its refine level, cards, fragments, and Random Options.
      a slot, it remains empty. If you were re-rolling a bonus, the previous bonus is kept.
        </div>
    </div>
  </div>
</details>


        <div class="box-tip">
<details class="oroza-accordion">
          <strong>Failure without destruction:</strong> your equipment remains intact. If you were unlocking a slot,
  <summary>🛡️ Safe VIP Enchantment</summary>
          it stays empty. If you were re-rolling an existing option, you keep the exact previous option.
  <div class="oroza-accordion-content">
          The payment is not refunded.
    <p class="oroza-section-text">
        </div>
      Players with <strong>active VIP status</strong> can use
       </div>
       <strong>Safe VIP Enchantment</strong>.
     </details>
     </p>


     <details class="oroza-accordion">
     <div class="oroza-grid oroza-grid-2">
       <summary>🛡️ VIP Safe Enchantment</summary>
       <div class="oroza-action-card">
      <div class="oroza-accordion-content">
        <h3 class="oroza-action-title">Full protection</h3>
         <p class="oroza-section-text">
         <p class="oroza-section-text">
           Players with <strong>active VIP status</strong> can use
           It completely removes the chance of destruction.
           <strong>VIP Safe Enchantment</strong>.
           Your equipment will never be destroyed while using this mode.
         </p>
         </p>
        <div class="oroza-grid oroza-grid-2">
          <div class="oroza-action-card">
            <h3 class="oroza-action-title">Full protection</h3>
            <p class="oroza-section-text">
              It completely removes the destruction chance. Your equipment cannot be destroyed
              while using this mode.
            </p>
          </div>
          <div class="oroza-action-card">
            <h3 class="oroza-action-title">Higher cost</h3>
            <p class="oroza-section-text">
              It costs <strong>double</strong> the normal price, whether you pay with Zeny or Cash Points.
            </p>
          </div>
        </div>
        <div class="box-info">
          <strong>The 5% destruction chance becomes success chance.</strong><br>
          For example, Slot 3 changes from 75% normal success to 80% success with VIP Safe Enchantment.
        </div>
       </div>
       </div>
    </details>


    <div style="margin: 20px auto; text-align: center;">
      <div class="oroza-action-card">
      <img src="/wiki/resources/assets/random_options/enchant_summary.png" alt="Enchantment summary and payment selection" class="round-fade">
        <h3 class="oroza-action-title">Double cost</h3>
    </div>
 
    <details class="oroza-accordion">
      <summary>⚔️ Enchantment paths</summary>
      <div class="oroza-accordion-content">
         <p class="oroza-section-text">
         <p class="oroza-section-text">
           The exact bonus remains random, but the system filters the roll according to your selected path.
           It costs <strong>twice</strong> the final attempt cost,
           Available paths depend on the equipment type.
           whether you pay with Zeny or Cash Points.
         </p>
         </p>
        <div class="oroza-table-wrap">
          <table class="oroza-info-table">
            <thead>
              <tr>
                <th>Equipment type</th>
                <th>Available paths</th>
              </tr>
            </thead>
            <tbody>
              <tr>
                <th>Weapons</th>
                <td>Physical, Magical, and Defensive.</td>
              </tr>
              <tr>
                <th>Shields</th>
                <td>Physical and Defensive.</td>
              </tr>
              <tr>
                <th>Garments and Shoes</th>
                <td>Defensive / Utility.</td>
              </tr>
              <tr>
                <th>Armors, Headgears, and Accessories</th>
                <td>Physical, Magical, and Defensive.</td>
              </tr>
            </tbody>
          </table>
        </div>
       </div>
       </div>
     </details>
     </div>


     <details class="oroza-accordion">
     <div class="box-info">
       <summary>📚 Possible bonuses by equipment type</summary>
       <strong>The 5% destruction chance becomes success chance.</strong><br>
       <div class="oroza-accordion-content">
       For example, Slot 3 increases from 85% Normal Success to 90% Safe VIP Success.
    </div>
  </div>
</details>


        <h3 style="margin-top: 0;">Weapons</h3>
<details class="oroza-accordion">
  <summary>⚔️ Weapon Enchantment Focus</summary>
  <div class="oroza-accordion-content">
    <p class="oroza-section-text">
      When modifying <strong>Slot 2, 3, or 4</strong> of a weapon, you may keep the general roll
      or specialize it to reduce bonuses that do not fit your build.
    </p>


        <div class="oroza-grid oroza-grid-2">
    <div class="oroza-table-wrap">
          <div class="oroza-action-card">
      <table class="oroza-info-table">
             <h3 class="oroza-action-title">⚔️ Physical Path</h3>
        <thead>
             <ul class="oroza-feature-list">
          <tr>
              <li>ATK +1 to +15.</li>
            <th>Focus</th>
              <li>ATK +1% to +5%.</li>
            <th>Effect</th>
              <li>CRIT +1 to +10.</li>
             <th>Cost</th>
              <li>Flat ASPD +1 to +2.</li>
          </tr>
              <li>ASPD +1% to +2%.</li>
        </thead>
              <li>Ranged physical damage +1% to +5%.</li>
        <tbody>
              <li>Melee physical damage +1% to +5%.</li>
          <tr>
              <li>Damage to normal monsters +1% to +3%.</li>
             <th>General</th>
              <li>Damage to Boss monsters +1% to +5%.</li>
            <td>Uses every available weapon option.</td>
              <li>Extra damage by race +1% to +3%.</li>
            <td>Base cost.</td>
              <li>Ignore Boss DEF +1% to +5%.</li>
          </tr>
            </ul>
          <tr>
          </div>
            <th>Physical Melee</th>
            <td>Filters the roll to prioritize physical melee bonuses.</td>
            <td>+50% base cost.</td>
          </tr>
          <tr>
            <th>Physical Ranged</th>
            <td>Filters the roll to prioritize physical ranged bonuses.</td>
            <td>+50% base cost.</td>
          </tr>
          <tr>
            <th>Magical</th>
            <td>Filters the roll to prioritize magical bonuses.</td>
            <td>+50% base cost.</td>
          </tr>
        </tbody>
      </table>
    </div>


          <div class="oroza-action-card">
    <div class="box-warning">
            <h3 class="oroza-action-title">🧙 Magical Path</h3>
      <strong>Important:</strong> Focus is only available for weapons from Slot 2 onward.
            <ul class="oroza-feature-list">
      Shields, armors, garments, shoes, accessories, and headgears do not have a Focus menu.
              <li>MATK +1 to +15.</li>
    </div>
              <li>MATK +1% to +5%.</li>
              <li>Magic damage to Boss monsters +1% to +5%.</li>
              <li>Ignore Boss MDEF +1% to +5%.</li>
            </ul>
          </div>
        </div>


        <div class="box-info">
    <div class="box-tip">
          <strong>Defensive Path:</strong> weapons also display a third NPC path,
      <strong>Example:</strong> if you choose a Focus and also use Safe VIP Enchantment,
          focused on defensive bonuses, HP, DEF, resistances, and stats.
      the system first adds the 50% Focus cost and then doubles the final amount for VIP safety.
        </div>
    </div>
  </div>
</details>


        <h3>Shields</h3>
<details class="oroza-accordion">
  <summary>📚 Bonus tables, slots, and rarities</summary>
  <div class="oroza-accordion-content">
    <p class="oroza-section-text">
      <strong>Slot 1</strong> uses exclusive base bonuses according to the equipment category.
      <strong>Slots 2, 3, and 4</strong> use extra bonus tables with common, rare, and epic options.
      Slot 4 uses the same bonus table as Slots 2 and 3.
    </p>


        <div class="oroza-action-card">
    <div class="box-info">
          <h3 class="oroza-action-title">🛡️ Defensive Path</h3>
      <strong>Full reference:</strong><br>
          <ul class="oroza-feature-list">
      On the <a href="https://en.orozaro.com/wiki/index.php?title=Bonus-equipo" target="_blank" rel="noopener"><strong>Equipment Bonuses</strong></a>
            <li>Max HP +50 to +1,500 or Max HP +1% to +6%.</li>
      page, you can filter results by:
            <li>DEF +1 to +5 or MDEF +1 to +5.</li>
      <ul class="oroza-feature-list">
            <li>Physical elemental damage resistance +1% to +3%.</li>
        <li>Equipment category.</li>
            <li>Magical elemental damage resistance +1% to +3%.</li>
        <li>Bonus slot.</li>
            <li>Normal monster or Boss resistance +1% to +3%.</li>
        <li>Rarity.</li>
            <li>Race resistance +1% to +3%.</li>
        <li>Bonus type and possible value range.</li>
            <li>Physical and magical size resistance +1% to +5%.</li>
      </ul>
            <li>Damage reflect +1% to +5%.</li>
    </div>
          </ul>
        </div>


        <h3>Garments and Shoes</h3>
    <div class="box-tip">
      <strong>Tip:</strong> review the tables before spending Zeny or Cash Points.
      This helps you understand which bonuses your equipment can receive and which slot is best for your build.
    </div>
  </div>
</details>


        <div class="oroza-grid oroza-grid-2">
<details class="oroza-accordion">
          <div class="oroza-action-card">
  <summary>🧷 Refine, cards, and fragments</summary>
            <h3 class="oroza-action-title">🧥 Garments</h3>
  <div class="oroza-accordion-content">
            <ul class="oroza-feature-list">
    <p class="oroza-section-text">
              <li>Flee +1 to +20.</li>
      Unlocking or re-rolling a slot does not remove your equipment's refine level,
              <li>Perfect Dodge +1 to +10.</li>
      cards, or inserted fragments.
              <li>Max SP +10 to +150 or Max SP +1% to +5%.</li>
    </p>
              <li>Elemental resistance +1% to +5%.</li>
            </ul>
          </div>


          <div class="oroza-action-card">
    <div class="box-warning">
            <h3 class="oroza-action-title">👢 Shoes</h3>
      <strong>Exception:</strong> if destruction occurs in Normal Mode, the entire equipment is lost
            <ul class="oroza-feature-list">
      along with everything attached to it.
              <li>Max HP +50 to +1,500 or Max HP +1% to +6%.</li>
    </div>
              <li>Max SP +10 to +200.</li>
  </div>
              <li>HP regeneration +1% to +10%.</li>
</details>
              <li>SP regeneration +1% to +10%.</li>
              <li>Extra EXP by race +1% to +8%.</li>
              <li>Extra EXP against all races +1% to +6%.</li>
            </ul>
          </div>
        </div>


        <h3>Armors, Headgears, and Accessories</h3>
<details class="oroza-accordion">
  <summary>❓ Frequently asked questions</summary>
  <div class="oroza-accordion-content">
    <div class="box-info">
      <strong>Can I choose the exact bonus?</strong><br>
      No. Bonuses are generated randomly from the table assigned to your equipment category,
      selected slot, and, for weapons, selected Focus.
    </div>


        <div class="oroza-grid oroza-grid-2">
    <div class="box-info">
          <div class="oroza-action-card">
      <strong>Can I manually remove a Random Option?</strong><br>
            <h3 class="oroza-action-title">⚔️ Physical Path</h3>
      No. The NPC only allows you to unlock empty slots or re-roll existing bonuses.
            <ul class="oroza-feature-list">
    </div>
              <li>ATK +1 to +20.</li>
              <li>ATK +1% to +5%.</li>
              <li>STR, AGI, DEX, or LUK +1 to +3.</li>
              <li>HP or SP regeneration +1% to +5%.</li>
            </ul>
          </div>


          <div class="oroza-action-card">
    <div class="box-info">
            <h3 class="oroza-action-title">🧙 Magical Path</h3>
      <strong>Is the fourth slot checked per account?</strong><br>
            <ul class="oroza-feature-list">
      No. The requirement of 10 Legendary Rebirths is checked on the character
              <li>MATK +1 to +20.</li>
      currently using the NPC.
              <li>MATK +1% to +5%.</li>
    </div>
              <li>INT or DEX +1 to +3.</li>
              <li>Cast reduction +1% to +3%.</li>
              <li>Delay reduction +1% to +3%.</li>
            </ul>
          </div>


          <div class="oroza-action-card">
     <div class="box-info">
            <h3 class="oroza-action-title">🛡️ Defensive Path</h3>
       <strong>Can a re-roll give exactly the same result?</strong><br>
            <ul class="oroza-feature-list">
      The system attempts to prevent the same bonus with the same value
              <li>Max SP +10 to +150.</li>
      from being obtained when re-rolling an existing slot.
              <li>Received healing +1% to +10%.</li>
              <li>SP consumption reduction +1% to +10%.</li>
            </ul>
          </div>
        </div>
      </div>
    </details>
 
     <details class="oroza-accordion">
      <summary>🔒 Refine, cards, and fragments</summary>
      <div class="oroza-accordion-content">
        <div class="box-tip">
          <strong>Your equipment remains intact on a normal success or failure.</strong><br>
          When unlocking or re-rolling a slot, refine level, cards, and inserted fragments
          are not lost as long as the equipment remains intact.
        </div>
 
        <div class="box-warning">
          <strong>The only exception is destruction.</strong><br>
          If a normal attempt lands on the 5% destruction result, the equipment disappears completely
          with everything applied or inserted into it.
        </div>
       </div>
    </details>
 
    <details class="oroza-accordion">
      <summary>❓ Frequently asked questions</summary>
      <div class="oroza-accordion-content">
 
        <div class="box-info">
          <strong>Can I re-roll as many times as I want?</strong><br>
          Yes. The system does not set an attempt limit or cooldown. Every attempt requires a new payment
          and may result in success, failure, or destruction when using normal mode.
        </div>
 
        <div class="box-info">
          <strong>What happens if I fail a re-roll?</strong><br>
          Your previous bonus remains unchanged. You only lose the currency used for that attempt.
        </div>
 
        <div class="box-info">
          <strong>What happens if I fail while unlocking an empty slot?</strong><br>
          The slot remains empty. Your equipment does not change, but the attempt cost is consumed.
        </div>
 
        <div class="box-info">
          <strong>Is the fourth slot account-wide?</strong><br>
          No. The requirement is checked on the character using the NPC. That character needs
          10 or more Legendary Rebirths.
        </div>
 
        <div class="box-info">
          <strong>Can I remove an option manually?</strong><br>
          The Enchantment Master system allows you to unlock and re-roll slots.
          It does not include an option to voluntarily delete an existing Random Option.
        </div>
 
        <div class="box-info">
          <strong>Are attempts recorded?</strong><br>
          Yes. Every attempt is internally registered with the character, equipment, slot, payment,
          roll result, outcome, and option change for system transparency.
        </div>
      </div>
    </details>
 
    <div style="margin: 20px auto; text-align: center;">
      <img src="/wiki/resources/assets/random_options/random_options_result.png" alt="Successful Random Options result" class="round-fade">
     </div>
     </div>
  </div>
</details>


    <div class="box-warning">
<div class="box-warning">
      <strong>Before enchanting a valuable item:</strong><br>
  <strong>Before enchanting a valuable item:</strong><br>
      Review the slot, path, cost, and safety mode. If your equipment has high refine,
  Review the slot, possible bonuses, cost, weapon focus, and risk.
      important cards, or difficult fragments, consider using
  For equipment with high refine, valuable cards, or difficult fragments,
      <strong>VIP Safe Enchantment</strong>.
  consider using <strong>Safe VIP Enchantment</strong>.
    </div>
</div>


   </div>
   </div>

Revisión actual - 13:14 3 jul 2026

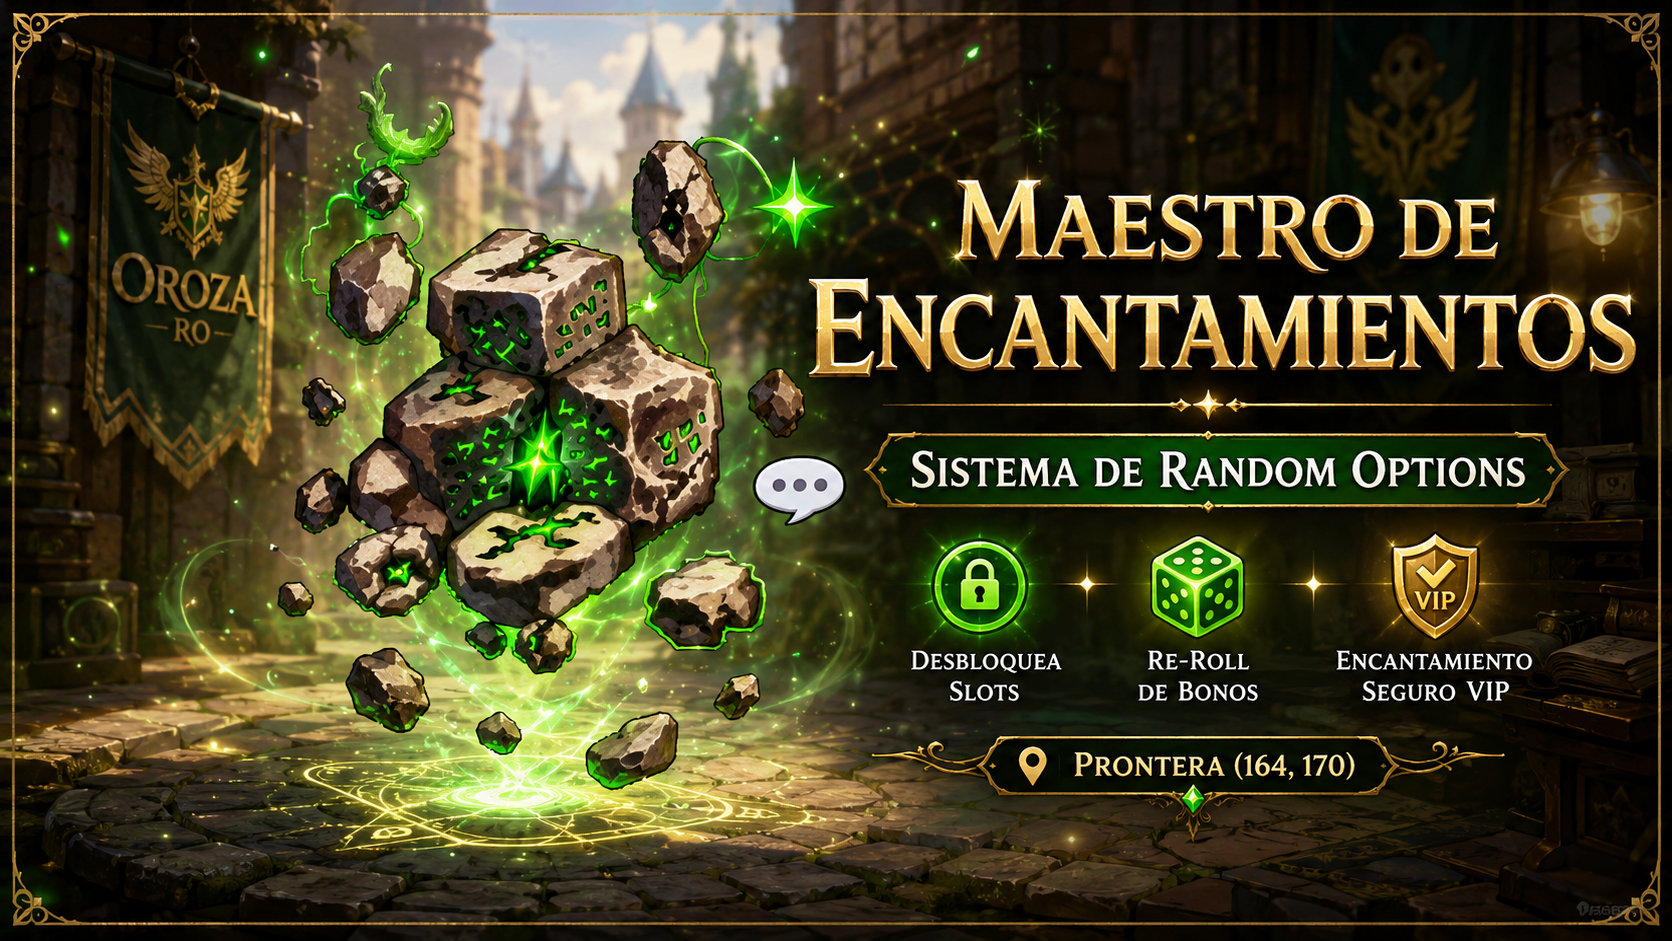
Master Enchant in Prontera

🌟 Enchantment Master

The Random Options system allows you to add random bonuses to your equipment, unlock new enchantment slots, and re-roll an existing bonus. You do not choose the exact bonus: the result is generated randomly according to the equipment category and the slot you are modifying.

📍 Location: Find the Master Enchant NPC in Prontera (164, 170).
You must equip the item you want to enchant before speaking with him.
📚 Check the bonus tables:
To review every available bonus and filter them by equipment category and bonus slot, visit: Equipment Bonuses .

What can it do?

You can unlock empty slots and re-roll existing bonuses on weapons, shields, armors, garments, shoes, accessories, and headgears.

What can it not do?

You cannot choose a specific bonus or manually remove a slot. Every roll uses the tables assigned to the selected equipment type.

🧭 How to use the Enchantment Master
  1. Equip the item you want to enchant.
  2. Speak with Master Enchant in Prontera (164, 170).
  3. Select Enchant Equipment.
  4. Choose the equipment position where your item is equipped.
  5. Review the current slots and choose one to unlock or re-roll.
  6. If it is a weapon and you modify Slot 2, 3, or 4, you may choose an optional focus.
  7. Select your payment method: Zeny or Cash Points.
  8. VIP players may also select Safe VIP Enchantment.
  9. The system will perform the roll and show whether it succeeded, failed, or destroyed the item.
Important: The cost is charged for every attempt, including failed attempts and attempts that result in equipment destruction.
🧩 Compatible equipment

The item must be equipped. The NPC recognizes the following categories:

Category Position recognized by the NPC
Weapons Weapon equipped in the right hand or weapon equipped in the left hand.
Shields Defensive equipment placed in the left-hand position.
Armors Equipment placed in the body position.
Garments Equipment placed in the Garment position.
Shoes Equipment placed in the Shoes position.
Accessories Accessory 1 and Accessory 2.
Headgears Top, Mid, and Low Headgear positions.
Note: You cannot directly select an item stored in your inventory, cart, or storage. You must equip it first.
🔓 Random Option slots and costs

All compatible equipment can have up to 3 slots. Characters with 10 or more Legendary Rebirths can use a fourth slot.

Slot Requirement Unlock Cost Re-roll Cost
Slot 1 Available from the beginning. 1,000,000 Zeny / 100 CP 1,000,000 Zeny / 100 CP
Slot 2 Slot 1 must have an active bonus. 3,000,000 Zeny / 300 CP 1,000,000 Zeny / 100 CP
Slot 3 Slot 2 must have an active bonus. 7,000,000 Zeny / 700 CP 1,500,000 Zeny / 150 CP
Slot 4 10+ Legendary Rebirths and Slot 3 active. 10,000,000 Zeny / 1,000 CP 1,500,000 Zeny / 150 CP
Progression rule: slots must be unlocked in order. You cannot unlock a slot while the previous slot is still empty.
💰 Payment methods

Every attempt can be paid with Zeny or Cash Points.

Conversion: 1 Cash Point = 10,000 Zeny.

The costs shown in the table are base costs. Weapon Focus and Safe VIP Enchantment modifiers are applied before payment.

🎲 Success rates and possible outcomes

In Normal Mode, each attempt can result in success, failure, or destruction. The destruction chance is 5% for every slot.

Slot Normal Success Normal Failure Normal Destruction Safe VIP Success Safe VIP Failure
Slot 1 95% 0% 5% 100% 0%
Slot 2 90% 5% 5% 95% 5%
Slot 3 85% 10% 5% 90% 10%
Slot 4 80% 15% 5% 85% 15%
Destruction: if it happens in Normal Mode, the equipment is completely lost, including its refine level, cards, fragments, and Random Options.
Failure without destruction: your equipment remains intact. If you were unlocking a slot, it remains empty. If you were re-rolling a bonus, the previous bonus is kept.
🛡️ Safe VIP Enchantment

Players with active VIP status can use Safe VIP Enchantment.

Full protection

It completely removes the chance of destruction. Your equipment will never be destroyed while using this mode.

Double cost

It costs twice the final attempt cost, whether you pay with Zeny or Cash Points.

The 5% destruction chance becomes success chance.
For example, Slot 3 increases from 85% Normal Success to 90% Safe VIP Success.
⚔️ Weapon Enchantment Focus

When modifying Slot 2, 3, or 4 of a weapon, you may keep the general roll or specialize it to reduce bonuses that do not fit your build.

Focus Effect Cost
General Uses every available weapon option. Base cost.
Physical Melee Filters the roll to prioritize physical melee bonuses. +50% base cost.
Physical Ranged Filters the roll to prioritize physical ranged bonuses. +50% base cost.
Magical Filters the roll to prioritize magical bonuses. +50% base cost.
Important: Focus is only available for weapons from Slot 2 onward. Shields, armors, garments, shoes, accessories, and headgears do not have a Focus menu.
Example: if you choose a Focus and also use Safe VIP Enchantment, the system first adds the 50% Focus cost and then doubles the final amount for VIP safety.
📚 Bonus tables, slots, and rarities

Slot 1 uses exclusive base bonuses according to the equipment category. Slots 2, 3, and 4 use extra bonus tables with common, rare, and epic options. Slot 4 uses the same bonus table as Slots 2 and 3.

Full reference:
On the Equipment Bonuses page, you can filter results by:
  • Equipment category.
  • Bonus slot.
  • Rarity.
  • Bonus type and possible value range.
Tip: review the tables before spending Zeny or Cash Points. This helps you understand which bonuses your equipment can receive and which slot is best for your build.
🧷 Refine, cards, and fragments

Unlocking or re-rolling a slot does not remove your equipment's refine level, cards, or inserted fragments.

Exception: if destruction occurs in Normal Mode, the entire equipment is lost along with everything attached to it.
❓ Frequently asked questions
Can I choose the exact bonus?
No. Bonuses are generated randomly from the table assigned to your equipment category, selected slot, and, for weapons, selected Focus.
Can I manually remove a Random Option?
No. The NPC only allows you to unlock empty slots or re-roll existing bonuses.
Is the fourth slot checked per account?
No. The requirement of 10 Legendary Rebirths is checked on the character currently using the NPC.
Can a re-roll give exactly the same result?
The system attempts to prevent the same bonus with the same value from being obtained when re-rolling an existing slot.
Before enchanting a valuable item:
Review the slot, possible bonuses, cost, weapon focus, and risk. For equipment with high refine, valuable cards, or difficult fragments, consider using Safe VIP Enchantment.